

Configuring your keyboard on MacOS
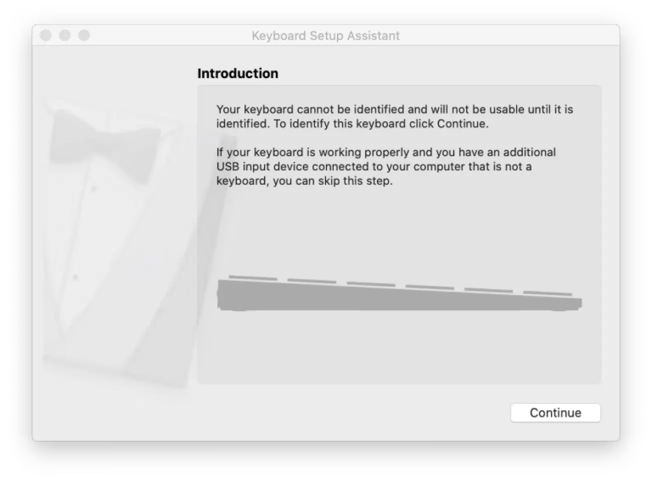
When you first plug your keyboard in, you might get the following popup asking you to identify the keyboard. Be sure the 3.5mm cable is connected to both halves before using the keyboard identification wizard. If keyboard identification fails, unplug the ErgoDox EZ USB cable from the machine, confirm the 3.5mm cable is securely connected (give it an extra push) to both halves, then reinsert the USB cable and try again. The wizard looks like this:
It’s trying to work out which of the 3 standard keyboard layouts this keyboard uses: ISO (European), ANSI (American) or JIS (Japanese).
This is purely the physical layout of the keyboard keys and nothing to do with your regional settings (e.g. whether when you hit Shift+3 you get a # like in the US, or a £ like in the UK) - that’s all configured separately in your OS. If you’re interested you can read more about this on Wikipedia.
The ErgoDox basically corresponds to ANSI, but macOS won’t let us just tell it that: it wants to try and identify the keyboard type by asking you to press the keys next to the left and right Shift keys:
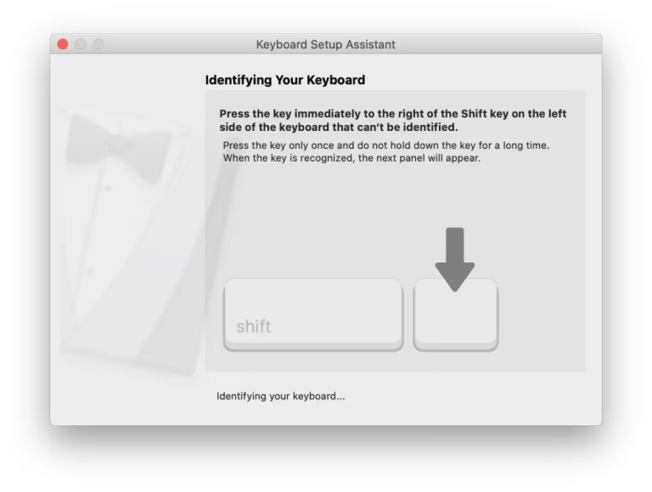
In the default layout the key to the right of the left Shift is Z (be sure to tap it and not hold it: by default holding it acts as Ctrl), and the key to the left of the right shift is /.
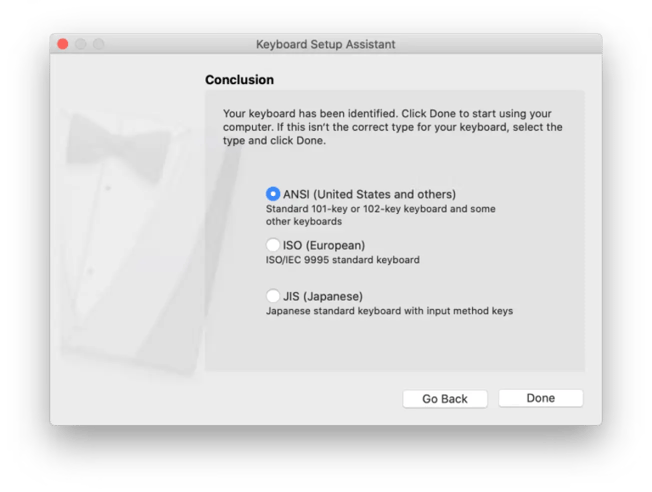
If this is successful, the keyboard should get correctly identified as ANSI:
A special note: German and Spanish are unique cases and you will usually want to choose ISO instead. If you accidentally chose the wrong one, you can always trigger this setup process again by going to System Preferences → Keyboard and hitting “Change Keyboard Type…”. After you change your keyboard type, you may need to restart your computer for this to take effect.
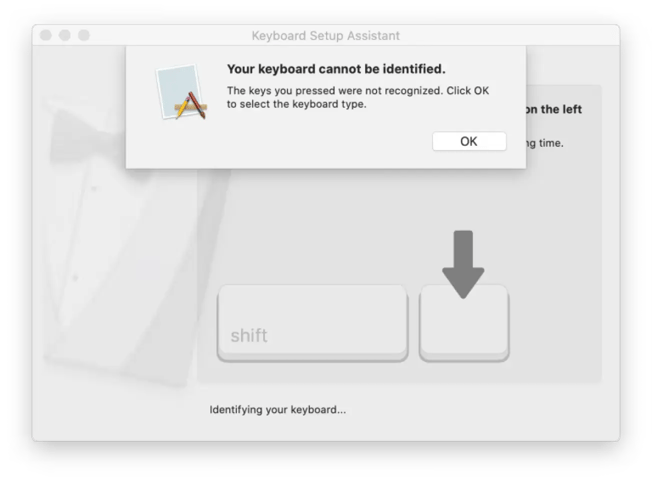
If for some reason you can’t get it to recognize your keypresses you can skip the previous step by pressing some obviously wrong keys (e.g. the F key) and it’ll ask you to choose the keyboard type you want:
Now you get to specify ANSI explicitly:
And you're done! Laid out like this, the macOS setup procedure looks long; in effect, it takes just a few moments and you're ready to rock with your new ErgoDox EZ.